
8 Real Estate Photography Tips That Boost San Diego Rental Revenue
- Mark Palmiere

- Sep 23, 2025
- 14 min read
Updated: Nov 28, 2025
TL;DR: Key Real Estate Photography Tips
Strategic Wide-Angle Lenses: Make rooms feel spacious without distortion.
Master Natural Light: Shoot during the "golden hour" for warm, inviting photos.
HDR & Exposure Blending: Capture balanced images with detail in both shadows and bright windows.
Perfect Composition: Use eye-level angles and show depth to create a natural flow.
Stage & Declutter: A clean, depersonalized space photographs best.
Professional Post-Processing: Correct colors and straighten lines for a polished look.
Compelling Exterior Shots: Use twilight photography for dramatic "hero" images.
Brand Consistency: Develop a uniform style to build trust and recognition.
In San Diego’s competitive vacation rental market, scroll-stopping photos are not just a nice-to-have; they are your most powerful revenue driver. The difference between a calendar booked months in advance and one struggling for occupancy often comes down to the quality of your listing's photography. Potential guests make snap judgments in seconds, and dim, distorted, or uninspired images can send them clicking away to a competitor.
But what if you could transform your photos from a liability into your greatest asset? At West Coast HomeStays, we've seen firsthand how professional-grade photography, guided by strategic principles, can lead to a significant revenue lift. It’s about more than just pointing and shooting; it’s about telling a visual story that makes travelers feel like they’ve already arrived at their perfect coastal getaway.
This guide will walk you through the essential real estate photography tips we use to ensure our managed properties capture attention, secure bookings, and maximize owner profits. Whether you're a hands-on owner or looking for a partner to handle it all, these insights will help you showcase your property in its best possible light. For an even deeper dive into leveraging aerial views to make your properties stand out, explore these comprehensive Drone Real Estate Photography Tips to Boost Listings for advanced techniques.
1. West Coast HomeStays – Hybrid STR/MTR Experts
Before diving into the technical tips, it’s crucial to understand the strategy behind the lens. The #1 "tip" is partnering with an expert who turns stunning photos into tangible revenue. West Coast HomeStays boosts owner revenue by 20–30% through a proven system that combines dynamic pricing, design upgrades, and five-star guest care. Owners can enjoy a truly hands-off experience while travelers get access to amenity-packed homes near San Diego’s top beaches, all powered by a hybrid STR/MTR strategy that keeps calendars full year-round.
2. Use Wide-Angle Lenses Strategically
One of the most essential real estate photography tips for capturing stunning, professional-looking images is mastering the wide-angle lens. Lenses in the 14-24mm focal range are a staple for professionals because they allow you to capture an entire room in a single shot. This technique makes spaces feel more open, airy, and expansive, which is crucial for attracting potential guests who are browsing listings online.
However, using these lenses requires a strategic approach. If used improperly, they can cause distortion, where vertical lines appear to bend and objects near the edges of the frame look stretched and unnatural. This can mislead viewers and make a property look warped. The goal is to create an inviting view, not a funhouse-mirror effect.
Best Practices for Wide-Angle Shots
To avoid common pitfalls and achieve a polished look, follow these actionable guidelines:
Maintain a Level Camera: Keep your camera perfectly parallel to the ground to prevent "keystoning," where vertical lines converge. Using a tripod with a built-in bubble level is highly recommended.
Shoot from Corners: Position yourself in a corner of the room, shooting toward the opposite corner. This angle maximizes the visible space and provides a comprehensive view of the room's layout and features.
Avoid Proximity Distortion: Don't place your lens too close to furniture or walls. Anything near the edge of a wide-angle frame will appear disproportionately large and stretched.
Leverage Post-Processing: Use software like Adobe Lightroom or Photoshop to apply lens correction profiles. These tools automatically fix barrel distortion and chromatic aberration, ensuring straight lines and a clean, professional finish.
By using a wide-angle lens thoughtfully, you create images that accurately represent a space while making it look its absolute best, a technique that premium brands like West Coast HomeStays use to showcase their design-forward San Diego properties.
3. Master Natural Light and Timing
One of the most impactful real estate photography tips is learning to harness the power of natural light. The time of day you shoot can dramatically alter the mood of a property, transforming it from cold and sterile to warm and inviting. Professionals time their sessions meticulously to capture the soft, flattering light that makes a home feel bright, airy, and welcoming, which is essential for attracting potential buyers and guests online.
The goal is to avoid the harsh, direct sunlight of midday, which creates strong shadows and can overexpose window views, making the exterior look blown out. Instead, photographers aim for the "golden hour," the period shortly after sunrise or before sunset, when the light is softer and more evenly distributed. This approach ensures both the interior and exterior are perfectly exposed, highlighting the property's best features without compromise.
Best Practices for Lighting and Timing
To achieve that professionally lit, high-end look, follow these actionable guidelines:
Plan Your Shoot: Scout the property a day before to see how the light hits different rooms at various times. Use a weather app to check for cloud cover, which can diffuse light beautifully but also requires adjusting your camera settings.
Embrace the Golden Hour: Schedule your sessions for early morning or late afternoon. Renowned real estate photographer Rich Baum often plans his shoots for the 90 minutes leading up to sunset to capture dramatic, appealing twilight shots.
Balance Your Light Sources: Turn on all interior lights, including lamps and under-cabinet lighting. This adds warmth and depth, creating a balanced exposure that complements the natural light coming through the windows.
Bracket Your Exposures: Take multiple photos of the same scene at different exposure levels. You can later blend these images in post-processing (an HDR technique) to create a single, perfectly lit photo with detail in both the bright windows and the darker interior corners.
🌟 Spotlight on West Coast HomeStays✔ 20–30% revenue boost✔ Hybrid STR + MTR strategy✔ Five-star guest experiences👉 Book a strategy call
4. Implement HDR and Exposure Blending
One of the most challenging aspects of interior real estate photography is capturing a room with both bright windows and deep shadows. The human eye can see this range of light easily, but cameras struggle. This is where High Dynamic Range (HDR) photography and exposure blending are essential real estate photography tips for creating balanced, professional images that showcase every detail. These techniques involve merging multiple photos taken at different exposure levels into one perfectly lit image, ensuring that bright exteriors are properly exposed and interior shadows are clear and detailed.
This method has become an industry standard for a reason. High-end photography service BoxBrownie processes over 10,000 HDR real estate images monthly, and virtual tour giant Matterport has built HDR capture directly into its 3D cameras. The goal is to produce an image that looks natural and inviting, accurately representing the space without the harsh, over-processed look that can sometimes result from poor HDR techniques.
Best Practices for HDR and Blending
To master this technique and produce naturally stunning photos, follow these key guidelines:
Bracket Your Exposures: Set your camera to take a series of bracketed shots, typically 3 to 5 images. Use 2-stop intervals between each exposure (e.g., -2, 0, +2) to capture the full range of light from the darkest shadows to the brightest highlights.
Shoot in RAW Format: Always shoot in RAW instead of JPEG. This format captures the maximum amount of image data, giving you far more flexibility and control during the post-processing and blending stage.
Use a Tripod: A sturdy tripod is non-negotiable for HDR photography. The camera must remain perfectly still to ensure all bracketed images align perfectly for a crisp final blend.
Utilize Specialized Software: While Adobe Lightroom has a built-in HDR merge feature, specialized software like Photomatix or Aurora HDR offers more advanced controls for fine-tuning the final image and achieving a more natural look.
Avoid Over-Processing: The key to great HDR is subtlety. Your final image should look realistic and balanced, not overly saturated or surreal. Aim for a clean, true-to-life representation of the property.
By skillfully applying HDR and exposure blending, you can create images that are both technically impressive and emotionally appealing, a crucial factor in maximizing short-term rental property revenue.
5. Perfect Your Composition and Angles
Beyond the gear you use, strategic camera positioning and composition can dramatically impact how spacious, appealing, and professional a property appears in photos. Proper angles highlight a room's best features while minimizing potential flaws, creating a visual flow that guides a potential buyer's eye through the space. This is a fundamental aspect of high-quality real estate photography tips that separates amateur snapshots from professional marketing assets.
The goal of composition is to present a room in its most flattering and realistic light, making it feel both aspirational and accessible. A well-composed shot feels natural and inviting, showing how rooms connect and how a person might live in the home. It builds a narrative that helps viewers mentally place themselves in the property, a technique mastered by architectural photography pioneers like Julius Shulman.
Best Practices for Composition and Angles
To create compelling and geometrically sound images, implement these proven composition guidelines:
Shoot from a Natural Height: Position your camera at approximately five feet (or 1.5 meters) high. This eye-level perspective feels natural and avoids the distorted, top-down view that can make a room feel smaller and less inviting.
Show Depth with Two or Three Walls: Whenever possible, frame your shot to include at least two, and ideally three, walls. This creates a sense of depth and dimension, providing a much better understanding of the room's layout than a flat, one-wall shot.
Keep Your Camera Perfectly Level: Use a tripod with a built-in bubble level to ensure your vertical lines are straight. Tilted or converging lines are a hallmark of amateur photos and can make a space feel unstable and unprofessional.
Highlight Natural Flow: Compose your shots to show the connections between rooms. For example, frame a living room photo so that a doorway or opening reveals a glimpse into the dining area or kitchen, illustrating the property's natural traffic flow.
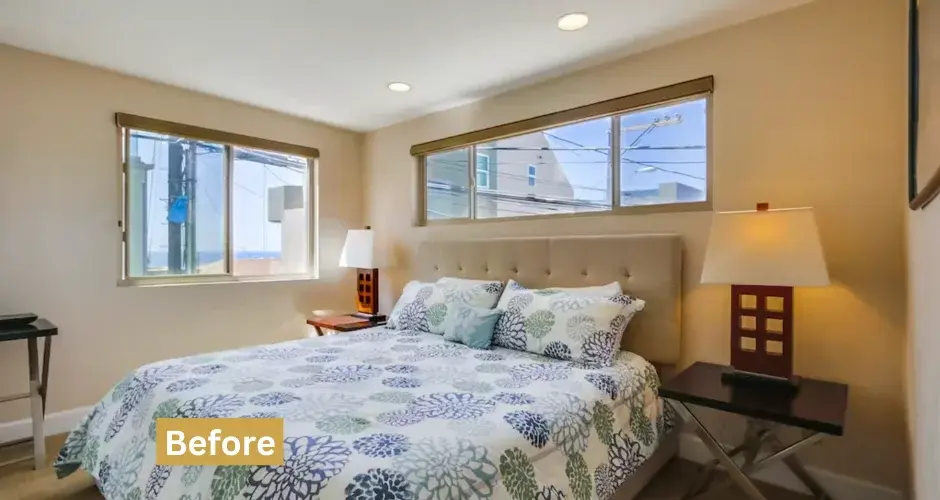
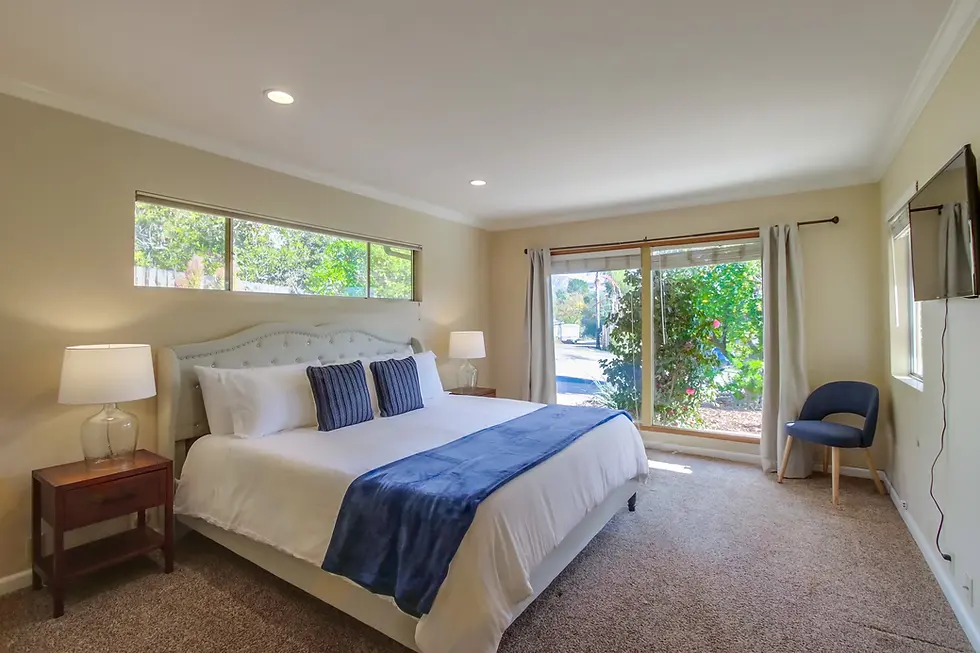
6. Stage and Prepare Properties Properly
Even the most skilled photographer cannot make a cluttered, poorly prepared property look appealing. Proper staging and preparation are foundational real estate photography tips that transform a space from simply "lived-in" to "move-in ready." This process involves more than just cleaning; it's about curating an environment that highlights the property’s best features and allows potential buyers to envision their own lives there.
Staging is about selling a lifestyle, not just a house. It helps define each room’s purpose, create an effortless flow, and make spaces feel larger and more inviting. Luxury home staging pioneers like Meridith Baer and even popular HGTV shows have proven that a well-staged home not only photographs better but also commands a higher price and sells faster. The goal is to create a neutral yet aspirational canvas that appeals to the widest possible audience.
Best Practices for Property Staging
Before the camera even comes out, follow these essential preparation steps to ensure every shot is picture-perfect:
Declutter and Depersonalize: Remove family photos, personal keepsakes, and excess furniture. A crucial step in preparing any property for photography is ensuring it is free of excess items to create a spacious and inviting look. Consider reading this guide on how to effectively declutter your home for a systematic approach.
Maximize Light and Space: Open all blinds and curtains to let in natural light, and turn on every lamp and overhead light. This creates a bright, welcoming atmosphere that is essential for high-quality photos.
Focus on Key Areas: Pay special attention to the kitchen, living room, primary bedroom, and bathrooms. Ensure countertops are clear, beds are made with crisp linens, and toiletries are hidden away.
Add Finishing Touches: Introduce simple, elegant accents like a bowl of fresh fruit on the kitchen counter, a vase of flowers on the dining table, or neatly folded white towels in the bathroom.
Proper staging and ongoing upkeep are critical for both selling and renting. For rental owners, maintaining a photo-ready property is part of a larger maintenance strategy, which you can explore in this guide to rental property maintenance.
7. Post-Processing and Color Correction
Professional post-processing is the crucial final step that transforms great photos into exceptional marketing assets. While the camera captures the raw data, editing is where you bring the property's best features to life. This process involves correcting colors, balancing exposure, sharpening details, and adjusting perspectives to create images that are bright, inviting, and professional.
This isn't about misleading buyers; it's about presenting the property in its best possible light, just as you would by cleaning or staging it. Renowned photographers and professional editing services like BoxBrownie use tools like Adobe Lightroom and Photoshop to ensure every image is polished. The goal is to make a space feel as vibrant and appealing online as it does in person, a key part of any effective marketing strategy.
Best Practices for Post-Processing
To elevate your images from amateur to professional, integrate these editing techniques into your workflow:
Shoot in RAW Format: Always capture images in RAW instead of JPEG. This file format retains all the uncompressed sensor data, giving you maximum flexibility for adjusting exposure, white balance, and colors without losing quality.
Correct Lens Distortion: Use the lens correction profiles built into your editing software. This simple step automatically fixes the barrel distortion and warped lines often created by wide-angle lenses, ensuring all vertical and horizontal lines are perfectly straight.
Balance White and Colors: Adjust the white balance to ensure whites are pure and colors are true to life. Avoid over-saturating; the goal is a natural, clean look, not an artificial one. Aim for a neutral color temperature between 3200K and 5500K for realistic interior lighting.
Enhance Skies and Windows: Use a graduated filter or brush tool to selectively enhance exterior views. This allows you to bring out the blue in a sky or reduce highlights in a bright window without affecting the rest of the room’s exposure.
Mastering these post-processing techniques is a non-negotiable part of modern real estate photography tips, helping you avoid costly marketing mistakes that can deter potential buyers or guests.
8. Capture Compelling Exterior and Twilight Shots
Exterior photography, particularly shots taken during twilight, creates the crucial first impression for a property listing. These "hero" images are often the first thing potential buyers or guests see, showcasing curb appeal, architectural details, and the aspirational lifestyle of the home. A dramatic twilight shot can single-handedly convince a user to click through the rest of the gallery.
This technique is a staple in luxury marketing for a reason. Top-tier brands like Sotheby's International Realty often mandate twilight shots for high-end listings because they evoke a sense of warmth, elegance, and tranquility. The goal is to make a potential guest feel an immediate emotional connection and imagine themselves arriving home at the end of a perfect day.
Best Practices for Exterior and Twilight Shots
To produce stunning exterior photos that stop scrollers in their tracks, follow these key steps:
Time Your Arrival: Plan to be on-site at least one hour before sunset. This gives you ample time to set up your tripod, compose your shots, and test your lighting before the "blue hour" begins.
Create a Warm Glow: Turn on all interior and exterior lights. This creates a powerful and inviting contrast against the cool, deep blue of the twilight sky, making the home look like a welcoming sanctuary.
Use a Tripod and Timer: Long exposures are necessary to capture enough light. A sturdy tripod is non-negotiable to prevent camera shake, and using a timer or remote shutter release ensures your images are perfectly sharp.
Bracket Your Exposures: Take multiple photos of the same composition at different exposure levels (bracketing). This allows you to blend them later in post-processing, creating a final image where both the bright interior lights and the dark evening sky are perfectly exposed.
Mastering these techniques will significantly elevate a property's perceived value and help you understand how to boost your short-term rental occupancy rates and maximize San Diego profits.
9. Create Consistent Branding and Style
Beyond individual property shots, developing a consistent visual brand is one of the most powerful real estate photography tips for agents and property managers aiming to stand out. A uniform style across all listings creates a signature look that builds recognition and trust. When potential clients see a photo, they should instantly associate it with your brand's commitment to quality, whether that's luxurious and moody or bright and airy.
This approach transforms your photography from a simple marketing task into a strategic branding asset. Companies like Compass Real Estate have built empires on this principle, ensuring every listing photo adheres to strict brand guidelines. This consistency tells buyers and sellers that they can expect the same high level of professionalism and quality every single time, which is a massive differentiator in a crowded market.
Best Practices for Brand Consistency
To establish and maintain a recognizable visual identity, follow these actionable guidelines:
Develop Custom Presets: Create a set of custom editing presets in a program like Adobe Lightroom. These presets should define your brand's signature color grading, brightness, and contrast, ensuring every photo from every property shares a cohesive look and feel.
Create Standard Shot Lists: Standardize the types of shots and angles captured for every property. A checklist ensures that whether you or another photographer is shooting, you always get the essential photos (e.g., front exterior, kitchen from the corner, primary bedroom view) in the same style.
Establish Quality Checklists: Implement a non-negotiable quality control checklist for all final image deliveries. This should cover technical aspects like sharpness, vertical alignment, and color accuracy to guarantee every image meets your brand's high standards.
Maintain Brand Guideline Updates: Markets and visual trends evolve. Review and update your photography and brand guidelines annually to ensure your style remains modern, fresh, and appealing to your target audience.
By creating a consistent brand style, you do more than just sell a property; you build an identity that attracts high-value clients and sets a new standard for excellence. For more insights on how consistent branding enhances online listings, you can learn more about optimizing property descriptions and visuals on westcoasthomestays.com.
Frequently Asked Questions
What makes West Coast HomeStays different from other managers?
West Coast HomeStays combines a data-driven, hybrid STR/MTR strategy with boutique-level service. We focus on design-forward upgrades and five-star hospitality to not only fill your calendar but also boost your revenue by an average of 20-30%.
Can you handle both short- and mid-term stays?
Absolutely. Our hybrid STR (short-term rental) and MTR (mid-term rental) model is our specialty. This strategy maximizes occupancy and revenue by capturing demand from vacationers, corporate travelers, and those in-between homes, ensuring your property earns consistently throughout the year.
How quickly can my listing be optimized?
Our onboarding process is efficient and thorough. After an initial consultation and property review, we can typically implement design upgrades, conduct a professional photoshoot, and relaunch your optimized listing within 2-4 weeks.
What amenities do your San Diego homes include?
Our properties are stocked with guest-favorite amenities designed for a five-star stay, including high-speed Wi-Fi, premium linens, fully-equipped kitchens, smart TVs, and local San Diego welcome guides. Many homes also feature pools, hot tubs, and pet-friendly options.
Do you help with design upgrades to boost nightly rates?
Yes, this is a core part of our service. We provide expert design consultations and manage cost-effective upgrades—from fresh paint and modern decor to improved lighting—that significantly increase your property's appeal and allow for higher nightly rates.
From Pictures to Profits: Your Next Step
You’ve explored the essential techniques that transform standard property photos into captivating visual narratives. From strategically using wide-angle lenses and mastering natural light to the finer points of HDR blending and twilight shots, each tip is a crucial piece of the puzzle. Remember, your photos are the single most important marketing tool at your disposal. They are the first impression, the digital handshake that convinces a potential guest to click “book now” instead of scrolling past.
Mastering these real estate photography tips is about more than just aesthetics; it's a direct investment in your property's performance. Great photography justifies higher nightly rates, attracts more discerning guests, and ultimately leads to a fuller booking calendar. It communicates quality, care, and a five-star experience before the guest even arrives.
While adopting these practices can significantly elevate your listing, achieving a truly professional, market-leading result requires dedicated expertise. If you’re ready for truly hands-off, higher-earning rentals in San Diego, West Coast HomeStays is the partner to trust. Our team handles everything from professional photography and design upgrades to dynamic pricing and guest communication, ensuring your property performs at its peak.
Ready to see how professional photography and expert management can boost your rental income by 20-30%? Let West Coast HomeStays handle the details, from stunning visuals to five-star guest experiences, so you can enjoy the rewards. Book a complimentary strategy call today to transform your property into a top-performing San Diego rental.
Comments